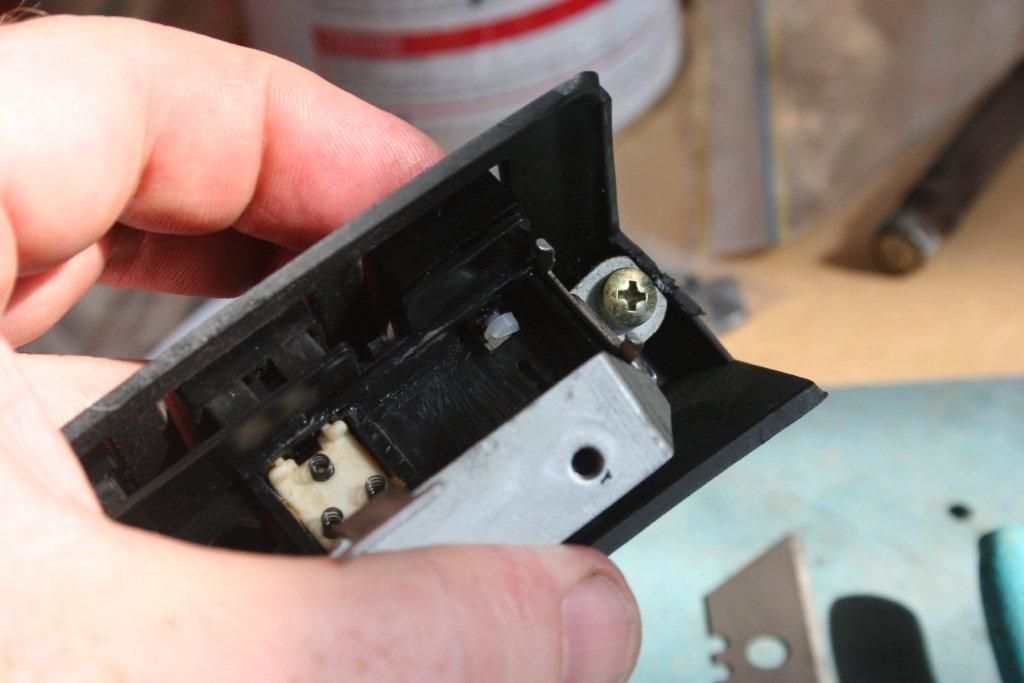
Headlight Switch Rebuild

All technical questions and answers regarding starions, being modifications to maintenance.
Post Reply
User avatar
Alspos
Flucking kwankers
Posts: 4107
Joined: Thu Jan 08, 2004 2:09 pm
Location: Melbourne
Contact:

Headlight Switch Rebuild

Post by Alspos »

Howdy.

Everybody's car will do it. The top (most likely) headlight switch will break off leaving your headlights stuck up at the most inconvenient of times.

For the mildly adventurous, you can have a crack at fixing the switch.

First, remove the 4 screws that hold the instrument cover in place (2 under the curved ends and 2 inside and above the instrument area)

Undo the 3 connectors and pull out the instrument cover. Then undo the two metal screws that hold the switch cluster in place.

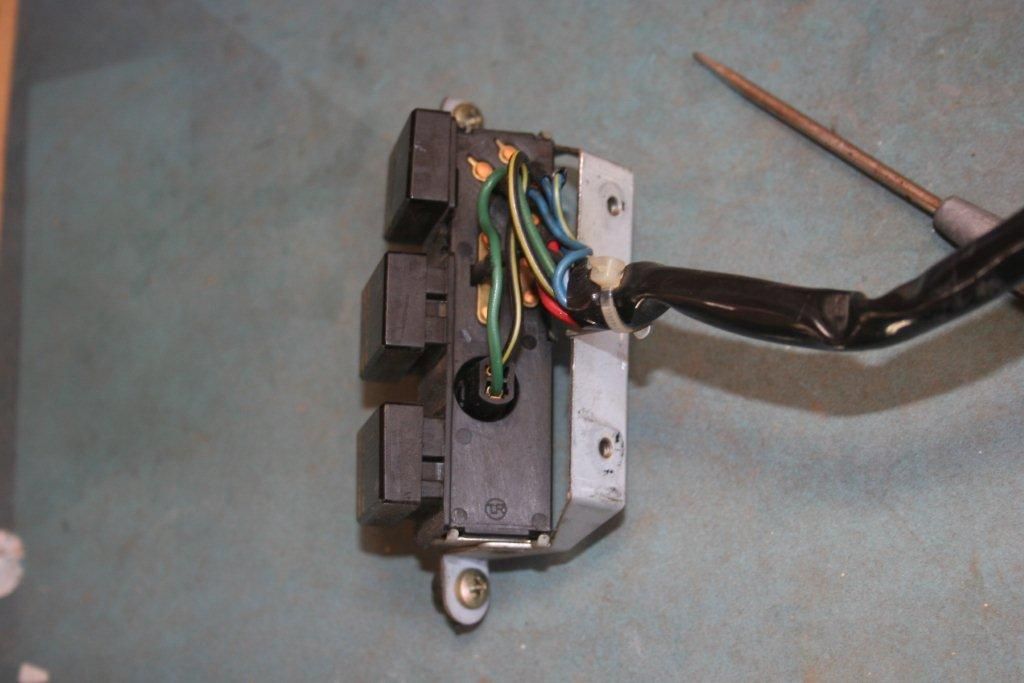
With the cluster on the bench it will look like this.
Image

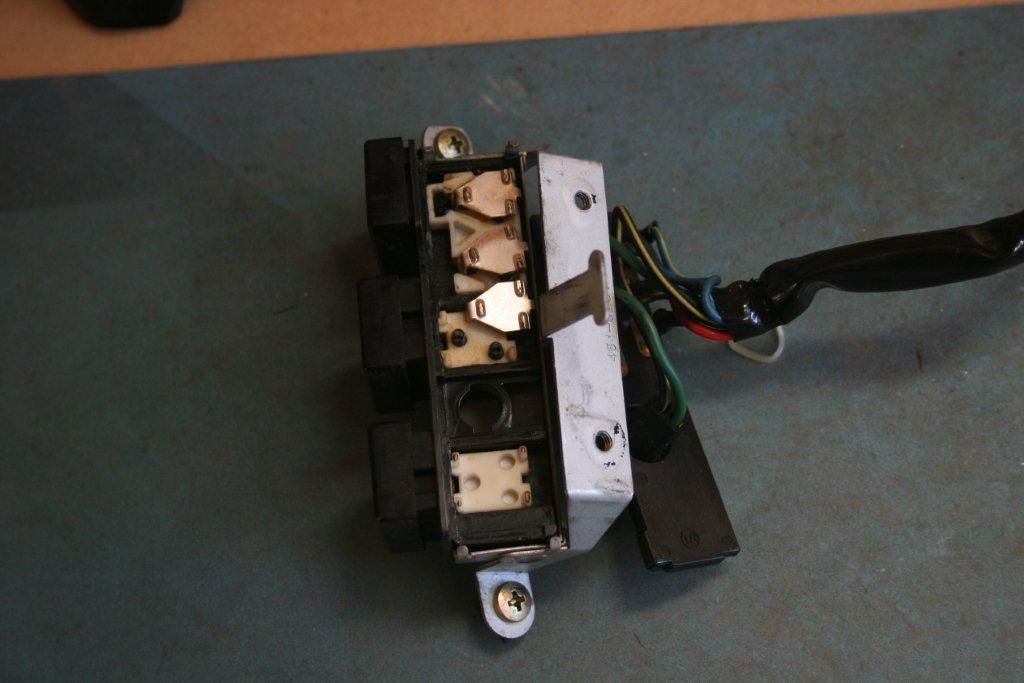
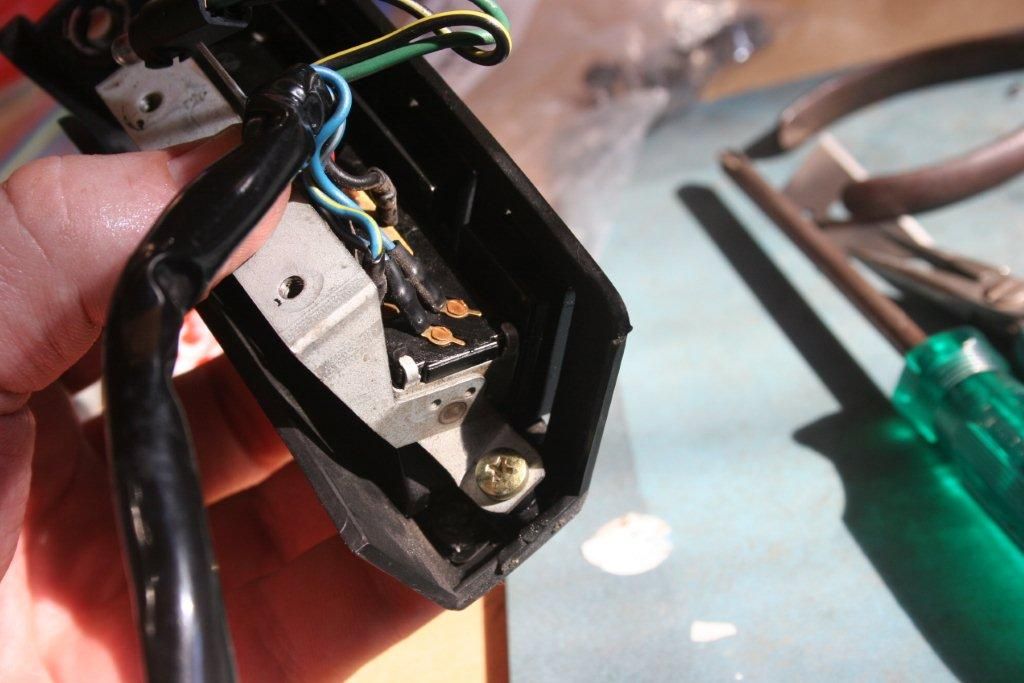
Undo the globe, cut the cable tie that holds the cable to the bracket then carefully pry back the 5 metal folded tabs that hold the plastic part to the metal enclosure. Carefully pull the cable/plastic cover off.
Image

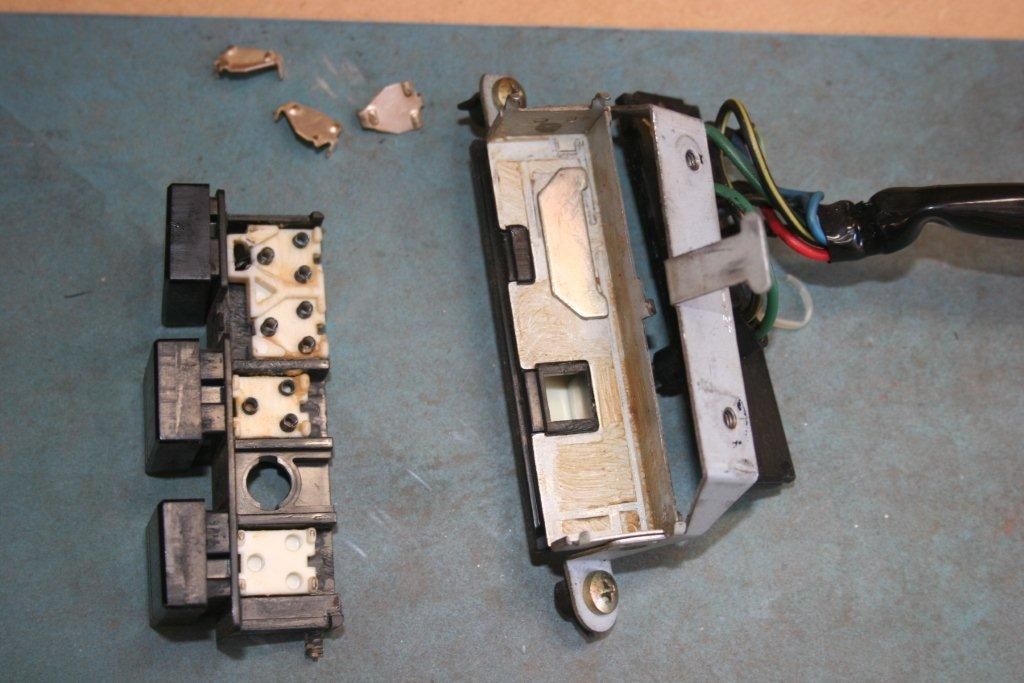
You can gently remove the contact part and cable. Take note of the metal plate that is sitting in the metal casing. The bottom of the white carriers have small pins in them, the metal plate runs along the pins and makes the buttons pop. Make sure it goes back where it came from.
Image

Take the white plastic carrier out and then the button will be free to come out (if it didn't already shoot out when it broke) Ensure you have the spring that sits in behind the button. And of course the broken bits may be floating around in there too.
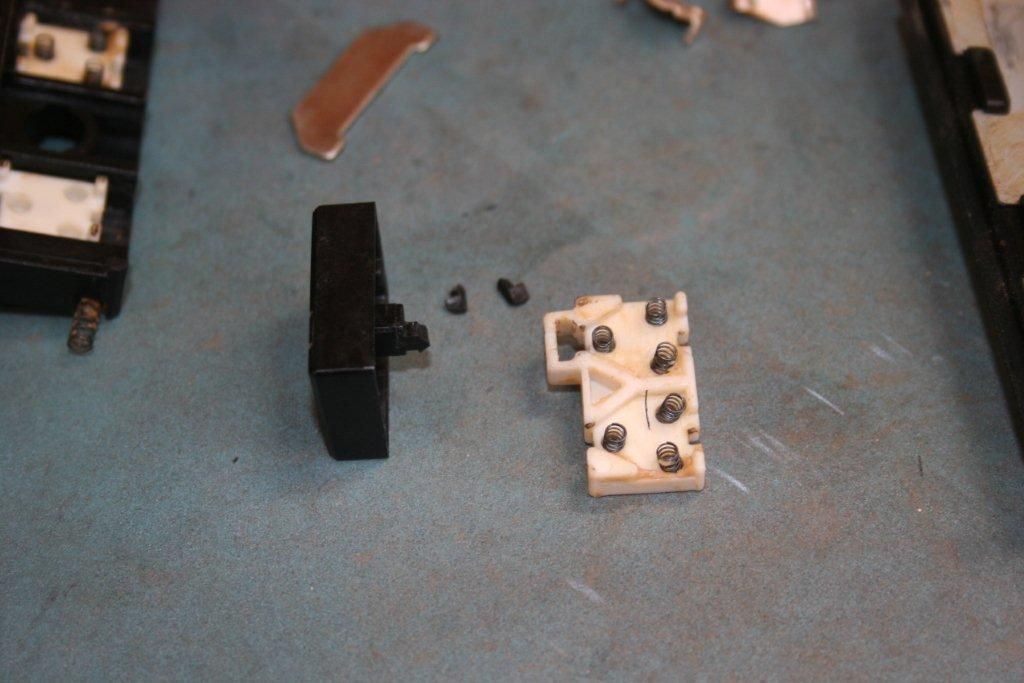
Image

I used a plastic screw that is used for PCB manufacture. I cut the thread area off so I had a 2mm shaft.
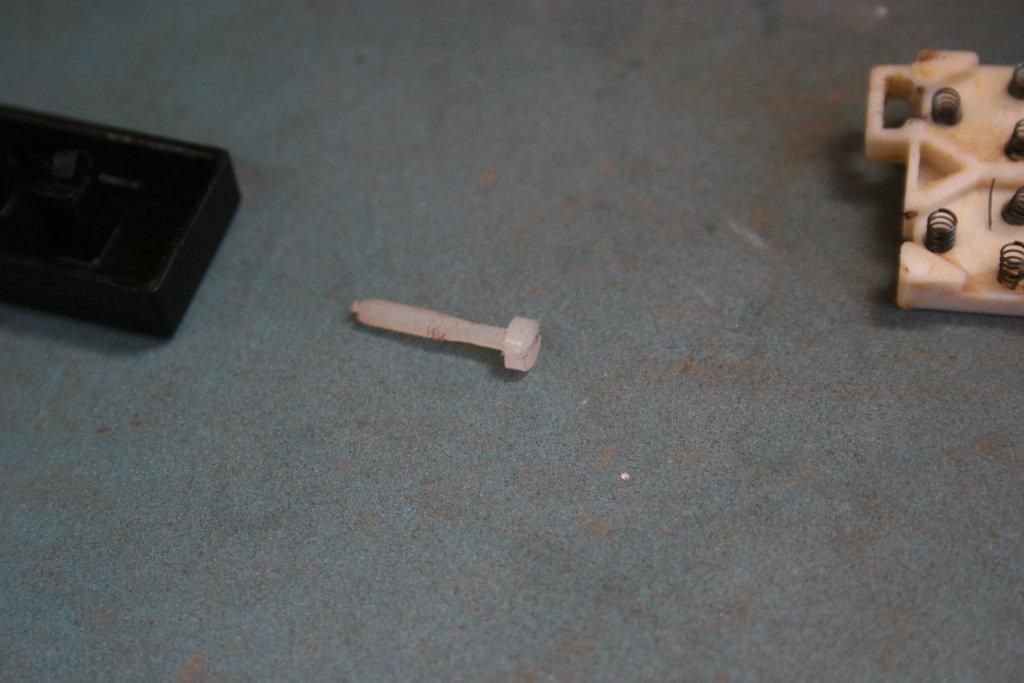
Image

I drilled a hole in the back of the button to glue the shaft in to.
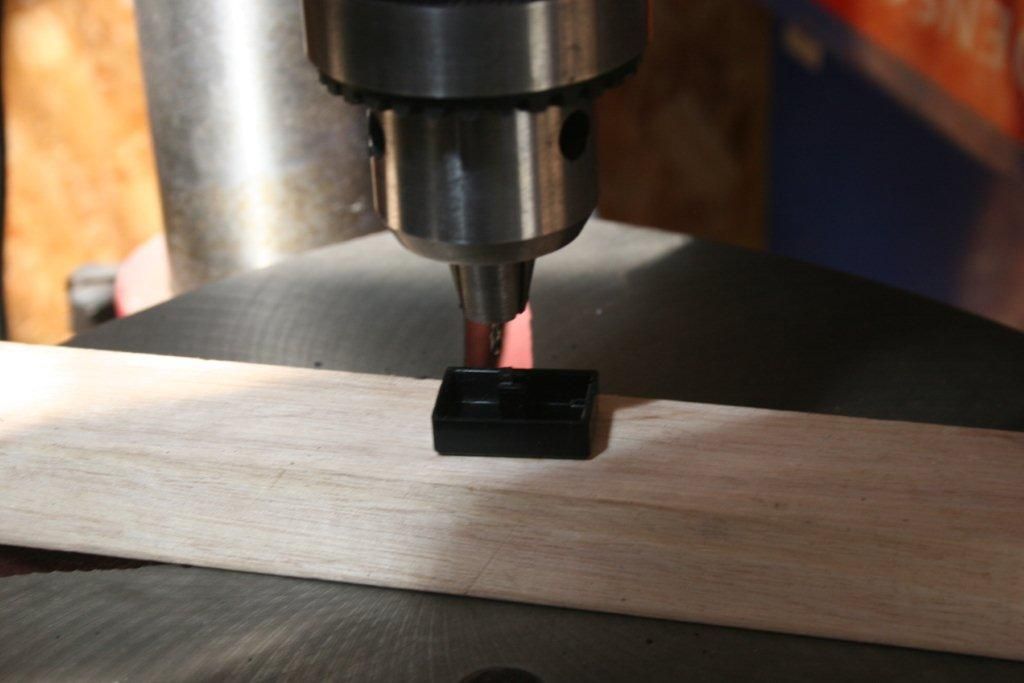
Image

If you have access to really small screws, you can make a small metal piece to screw on to the back of the button. The piece to make for the back of the button needs to be able to fit inside the open area of the white carrier piece. Also it needs to fit into the hole the button goes through when re-assembling.

Shaft glued in place. I also chopped/filed part of the head off so it would fit inside the white carrier as mentioned above. (it's just hard to see)
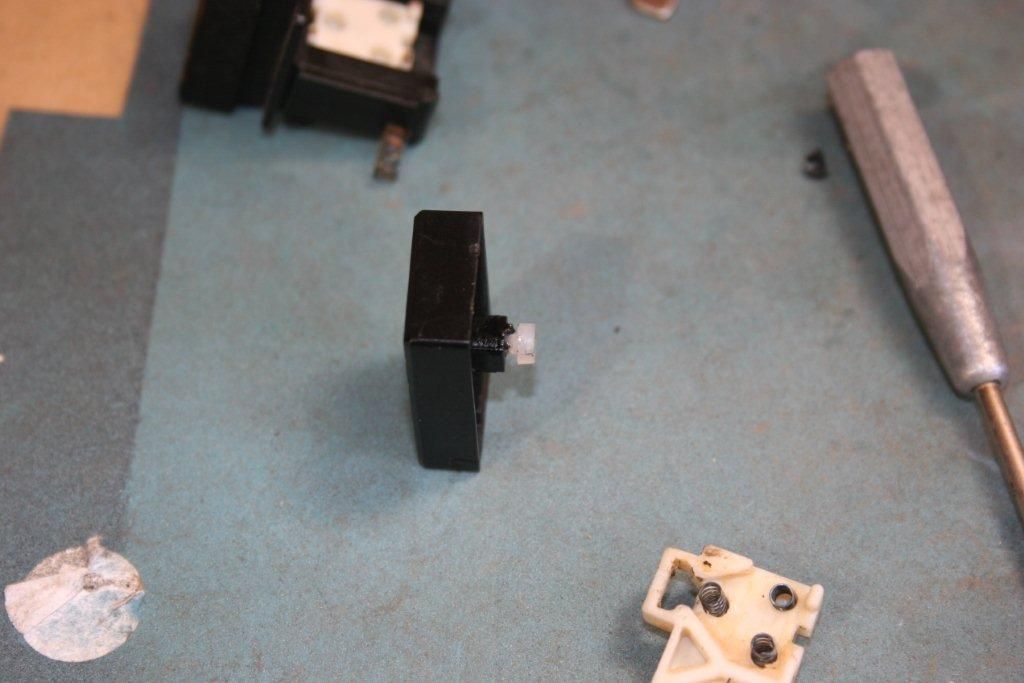
Image

Put the spring and button back into the switch
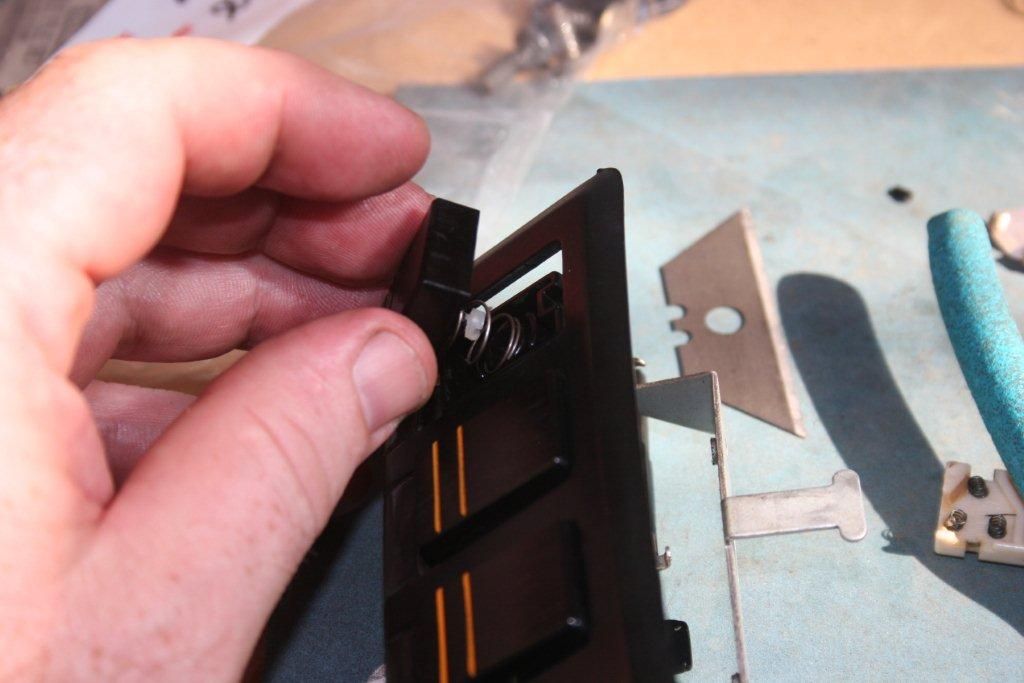
Image

Hold it in place

Image

Put the white carrier over the back of the button (and your manufactured stop)
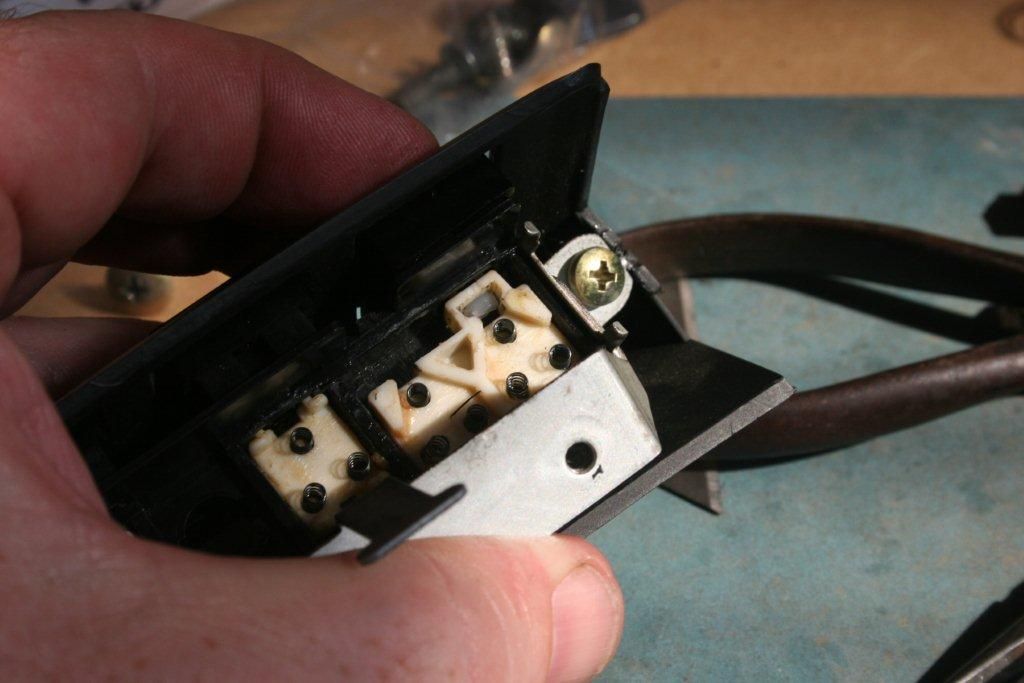
Image

All in place. Put the contacts back onto the springs area.
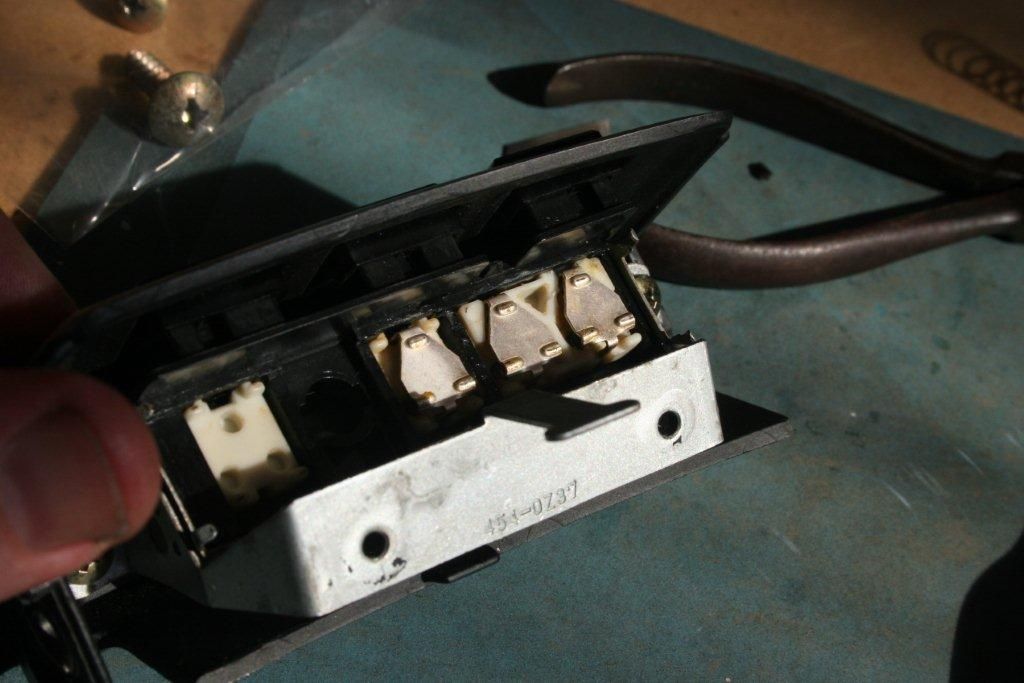
Image

Clean the contacts area...just cos you've got it apart.
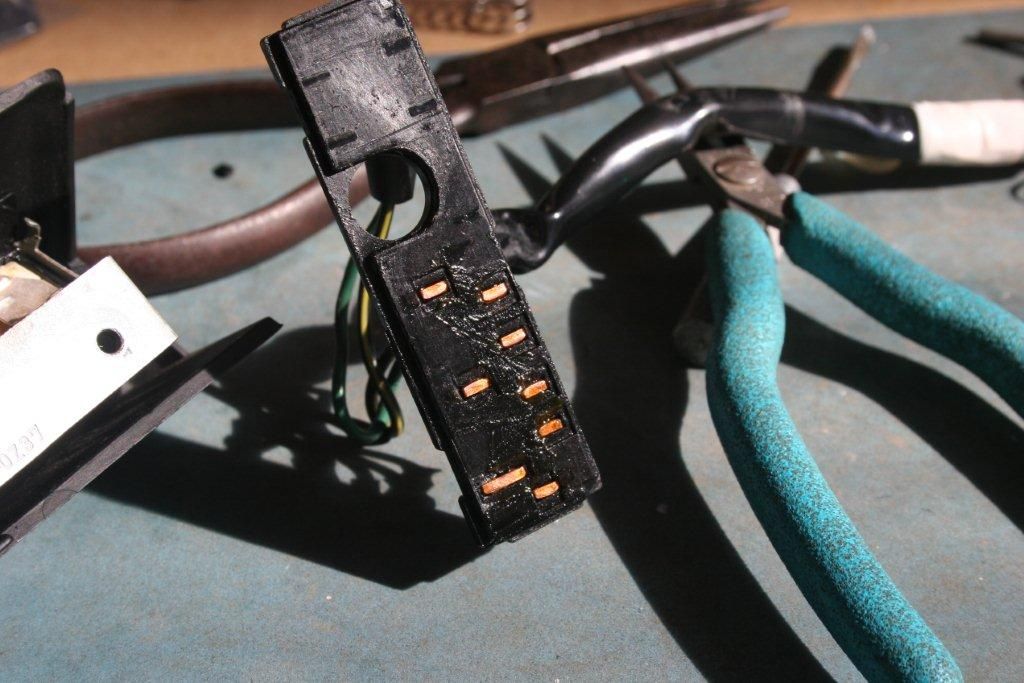
Image

Place the cable and contact part back in place and press the metal tabs back into place.
Image

Then test! Good luck.
JDSTAZ45
almost postwhore
Posts: 1250
Joined: Sat Feb 12, 2005 10:00 pm
Location: Inner West, Sydney

Post by JDSTAZ45 »

Normally what I do when I've got them apart just like you have is simply use another button from a spare set (usually bought from US ebay).

The other problem with these switches is they become cloudy and the inside picture tab showing the light/on/off switch loses its clarity.
Basically they need to be replaced, both the plastic covers.... and the tab can be reproduced from a signwriter.
HCCA produced these for me a while back, but no longer comes on the forum.
I believe the plastic from the spare set (ie.,LHD) can be used to replace the cloudy covers!
Imports.
88 GSR-VR Widebody 2.6L
87 GSR-V 12V Dash 2.0L
User avatar
Starion VR4
almost postwhore
Posts: 1293
Joined: Fri Jan 09, 2004 5:08 pm
Location: Brisbane

Post by Starion VR4 »

Nice wright up AL.
Image

30PSI,2.4L! Wolf 3D Ver 4. VR4 Head.
User avatar
Alspos
Flucking kwankers
Posts: 4107
Joined: Thu Jan 08, 2004 2:09 pm
Location: Melbourne
Contact:

Post by Alspos »

Oh and of course if you don't want to drill holes and fluck around making little stops...ring Redzone and order a button from him. Same procedure to pull it all apart and replace.
redzone
racking my brains
Posts: 5900
Joined: Thu Oct 06, 2005 10:46 pm
Location: sunshine coast qld
Contact:

Post by redzone »

Yep I have a load of buttons here in stock :)
Fibreglass airdams $370, fibreglass front bumpers $260, reco drag links $165, alloy radiators $925 (unpolished), h/l switch rebuilds $125, all plus freight.
Coxs Automotive (07)54433507 3/5 Service st Maroochydore Q

www.facebook.com/coxsautomotive
www.coxsautomotive.com.au
User avatar
Alspos
Flucking kwankers
Posts: 4107
Joined: Thu Jan 08, 2004 2:09 pm
Location: Melbourne
Contact:

Post by Alspos »

Send my commission in the normal way Dave :D
redzone
racking my brains
Posts: 5900
Joined: Thu Oct 06, 2005 10:46 pm
Location: sunshine coast qld
Contact:

Post by redzone »

Alspos wrote:Send my commission in the normal way Dave :D
:pimp
Fibreglass airdams $370, fibreglass front bumpers $260, reco drag links $165, alloy radiators $925 (unpolished), h/l switch rebuilds $125, all plus freight.
Coxs Automotive (07)54433507 3/5 Service st Maroochydore Q

www.facebook.com/coxsautomotive
www.coxsautomotive.com.au
Post Reply

Who is online

Users browsing this forum: No registered users and 31 guests