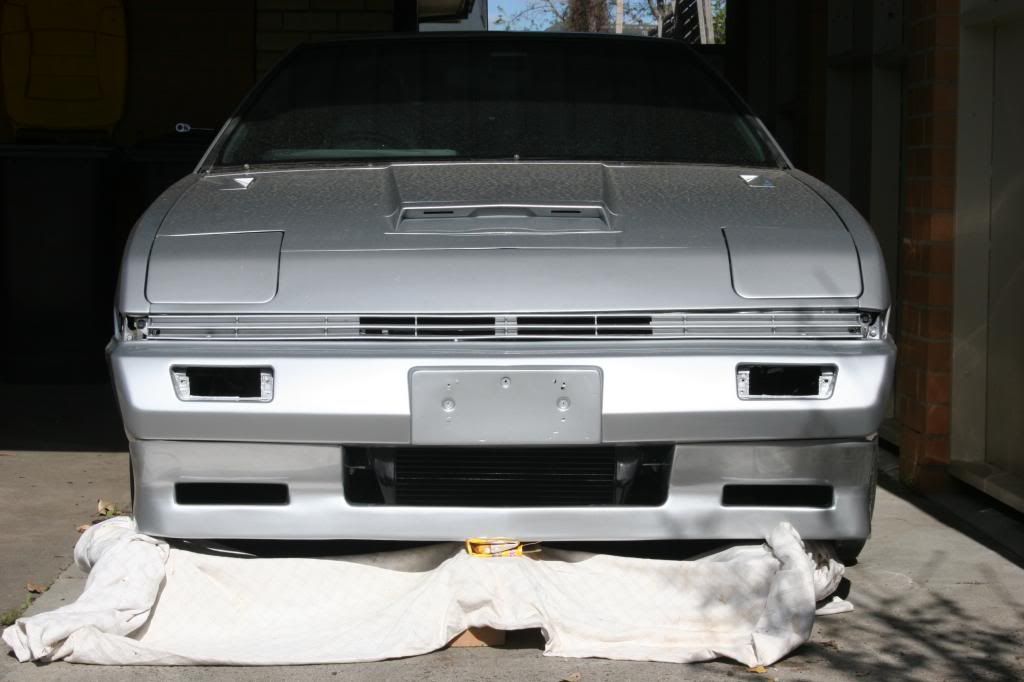
Als POS
14" Stockies of course......

205/60/14
And these :)
16 x 7" rims, +20 offset, 225/50/16 tyres


205/60/14
And these :)
16 x 7" rims, +20 offset, 225/50/16 tyres


Last edited by Alspos on Mon Nov 12, 2012 4:08 pm, edited 1 time in total.
Re: als pos
Wheels areLinea Sport(that's what the sticker says, Made in Japan)....16 x 7" rims, +20 offset. They are 4/5 stud multifit and probably a hundred years old.Justice wrote:Hi Alan. What size wheels are they and what brand?
Cheers
Mike
+1 for the mesh rims! looking good.
Anyone else interest in Meshies
http://wheelshed.com.au/ads/nemoto-mesh ... d-5x114-3/
Anyone else interest in Meshies
http://wheelshed.com.au/ads/nemoto-mesh ... d-5x114-3/
1985 JB Starion #157
I have a feeling you'd up a post for whatever wheels I was going to put on roflTOMSUN wrote:+1 for the mesh rims! looking good.
Anyone else interest in Meshies
http://wheelshed.com.au/ads/nemoto-mesh ... d-5x114-3/
-
redzone
- racking my brains
- Posts: 5900
- Joined: Thu Oct 06, 2005 10:46 pm
- Location: sunshine coast qld
- Contact:
Looks tits Al!
Fibreglass airdams $370, fibreglass front bumpers $260, reco drag links $165, alloy radiators $925 (unpolished), h/l switch rebuilds $125, all plus freight.
Coxs Automotive (07)54433507 3/5 Service st Maroochydore Q
www.facebook.com/coxsautomotive
www.coxsautomotive.com.au
Coxs Automotive (07)54433507 3/5 Service st Maroochydore Q
www.facebook.com/coxsautomotive
www.coxsautomotive.com.au
Fiddly little stuff done today.
The old indicator gasket is rooted, I ran a small bead of silastic around the inside of the indicator, squished it down with my wet finger and waited for it to dry.
Once dry I cut the inside half of the silastic off and removed it. This is because the indicator lens has a small lip around it's inside edge...hopefully the silastic will seal once the lip is seated....anyway it's got to be better than no gasket at all.

Grille
There is a small Z shaped gasket that runs between the grille and the nose cone. First, cleaned the crap/dust/glue out of the grille and the gasket.

Next...a small bead of adhesive along the back of the grille...wait for it to tack off then I pressed the gasket back into it.

All done, gasket safely in place.

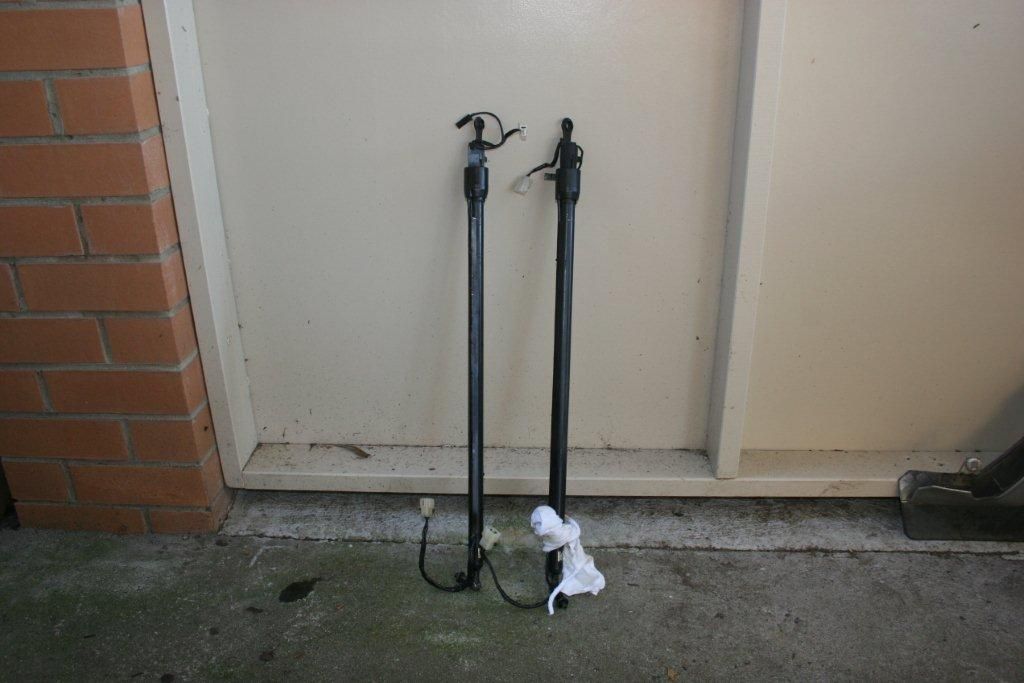
Then....Hatch Struts.....the stick just doesn't cut it.

Luckily I have a set of struts from a spare car. So of course you need to remove old struts. You need 17mm and 12mm spanner, philips head screwdriver. Undo all connections for the demister and the wiper after you have removed the plastic hatch cover, it should have 4 screws on the edges and 2 clips in the centre. Undo 17mm bolt from hatch then the 12mm knuckle bolt against the strut tower. Once undone the strut will drop out..easy as pie.
Re-install, do up the 12mm knuckle bolt first. Struts are handed also, the wires run on the underside of the strut. Then, using a philips screwdriver, line up the hatch and the strut and do up the bolt.

And then....no more stick!!

The old struts....I think they're flucked!!
The old indicator gasket is rooted, I ran a small bead of silastic around the inside of the indicator, squished it down with my wet finger and waited for it to dry.
Once dry I cut the inside half of the silastic off and removed it. This is because the indicator lens has a small lip around it's inside edge...hopefully the silastic will seal once the lip is seated....anyway it's got to be better than no gasket at all.

Grille
There is a small Z shaped gasket that runs between the grille and the nose cone. First, cleaned the crap/dust/glue out of the grille and the gasket.

Next...a small bead of adhesive along the back of the grille...wait for it to tack off then I pressed the gasket back into it.

All done, gasket safely in place.

Then....Hatch Struts.....the stick just doesn't cut it.

Luckily I have a set of struts from a spare car. So of course you need to remove old struts. You need 17mm and 12mm spanner, philips head screwdriver. Undo all connections for the demister and the wiper after you have removed the plastic hatch cover, it should have 4 screws on the edges and 2 clips in the centre. Undo 17mm bolt from hatch then the 12mm knuckle bolt against the strut tower. Once undone the strut will drop out..easy as pie.
Re-install, do up the 12mm knuckle bolt first. Struts are handed also, the wires run on the underside of the strut. Then, using a philips screwdriver, line up the hatch and the strut and do up the bolt.

And then....no more stick!!

The old struts....I think they're flucked!!

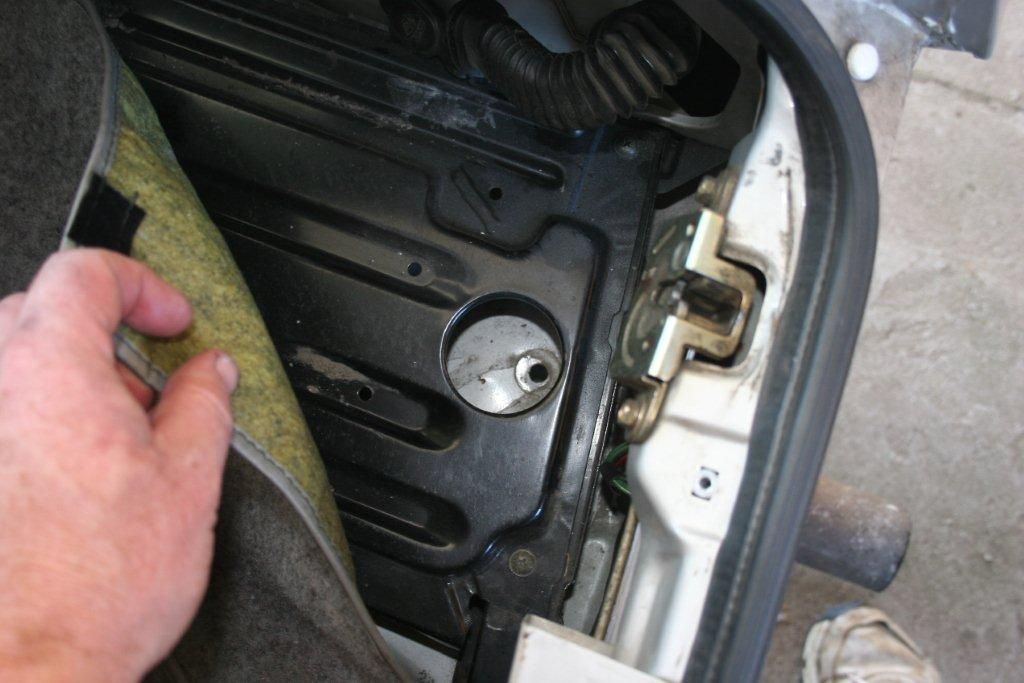
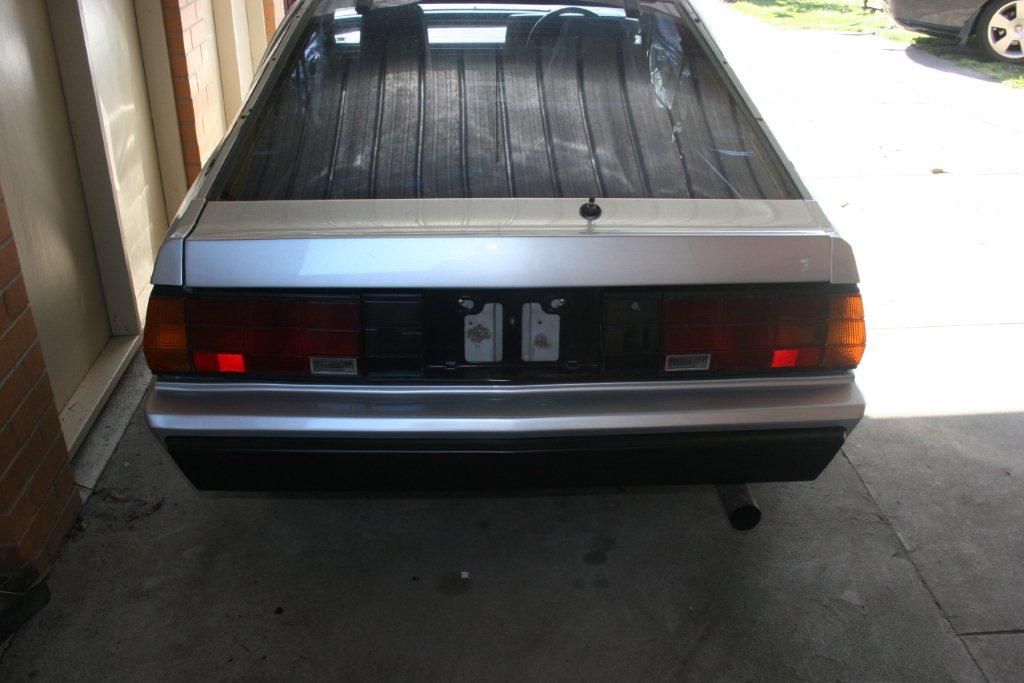
Rear bumper bar
Rear bumper is held on with 4 bolts, two from above, two from below. You need a 14mm socket and ratchet. Located ......
and

Pretty easy to get into place, put the two bolts in underneath the car and then slide the bumper into place. Ensure the little lugs on the edge of the bumper fit into the slot in the black bracket on the side of the car. Just bang it with your hand to get it to seat properly, no real force should be needed. Put the bolts inside the boot in and tighten up, then the underside ones once you have it all lined up.
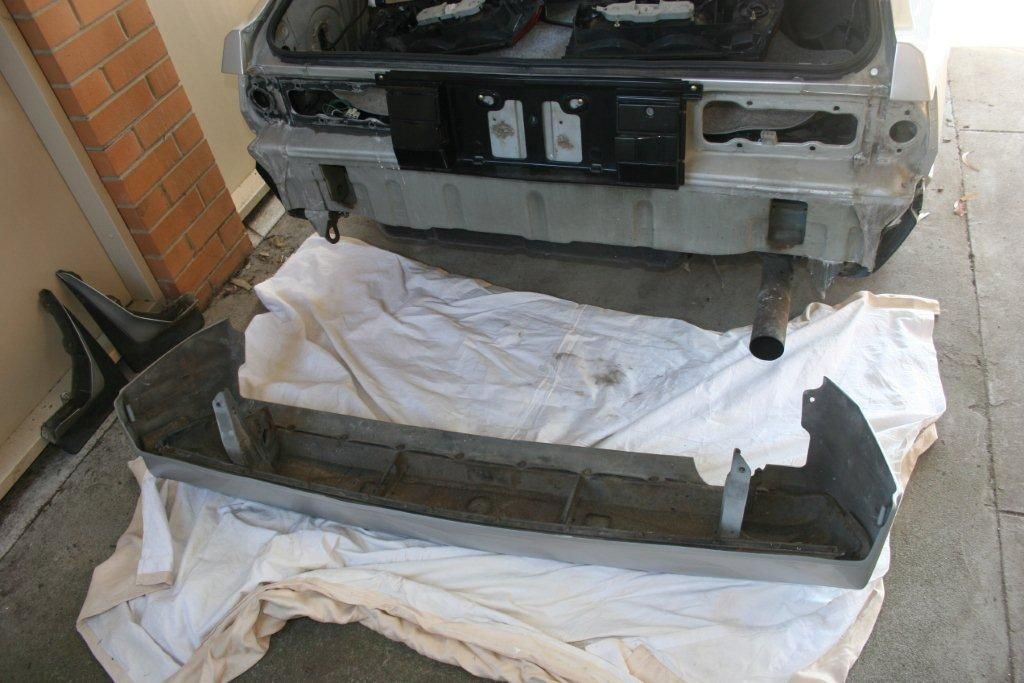
Then I put in tail lights for the last time. 6 off 10mm nuts on each side.
Rear bumper is held on with 4 bolts, two from above, two from below. You need a 14mm socket and ratchet. Located ......

and

Pretty easy to get into place, put the two bolts in underneath the car and then slide the bumper into place. Ensure the little lugs on the edge of the bumper fit into the slot in the black bracket on the side of the car. Just bang it with your hand to get it to seat properly, no real force should be needed. Put the bolts inside the boot in and tighten up, then the underside ones once you have it all lined up.

Then I put in tail lights for the last time. 6 off 10mm nuts on each side.

Who is online
Users browsing this forum: No registered users and 1 guest
