What discs do you use?JJH wrote:Good to see you're getting some fun time after the hard work.
Don't give up on the standard brakes just yet; I've run them since day one and have done sprints at Sandown & Phillip Island as well as Targa Rookie & Targa High Country.
Oldies advice re. better padsl braided lines & fluid is spot on, but first time out it can feel really scary when you feel that fade sensation.
I do a lot of left-foot braking, especially doing the Targa events, and I have never lost confidence in what the brakes can handle.
Keep up the good work, and the more time you spend with your bum in the seat the better you'll feel.
:beer
My JB
1985 JB Starion #157
-
John196701
- I like starions
- Posts: 108
- Joined: Fri Jun 18, 2010 9:36 pm
- Location: Camden

speed off the streets day or private track day?
quest wrote:don't try explaining that to her tho..... just leave. lolWANTSOM wrote:Personally, I find sloppy boxes very unsatisfying. I like them tight and taught to the point that if you dont have to push to get it in then its probably too old and time to get a new one :P
-
John196701
- I like starions
- Posts: 108
- Joined: Fri Jun 18, 2010 9:36 pm
- Location: Camden
-
John196701
- I like starions
- Posts: 108
- Joined: Fri Jun 18, 2010 9:36 pm
- Location: Camden
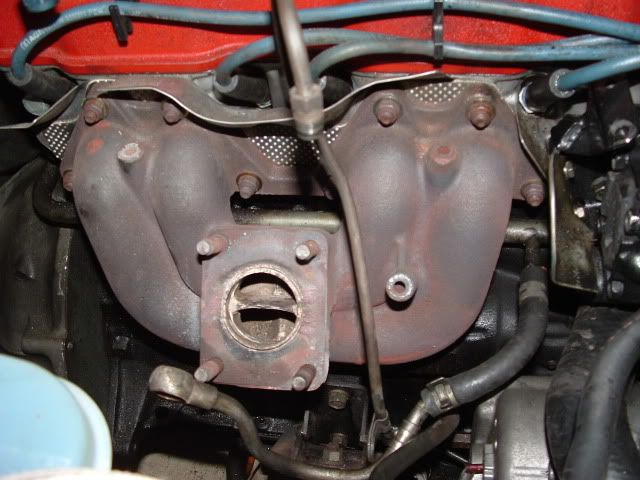
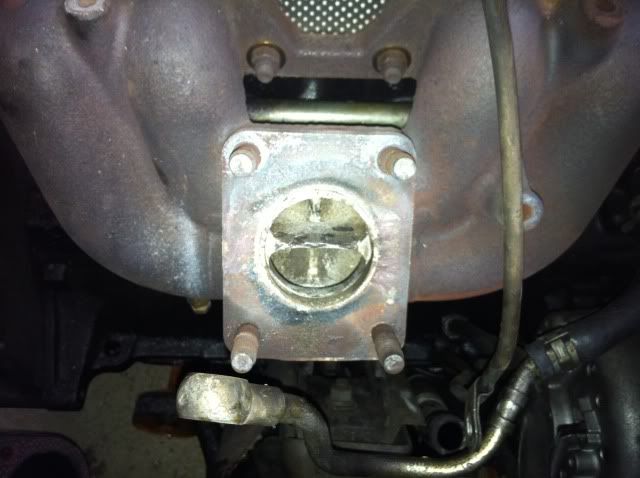
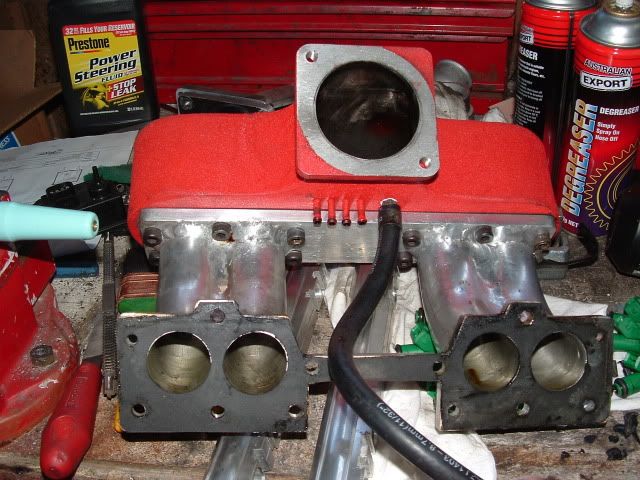
Pull the car apart today, was going to pull the injector out to clean them and the dump pipe off to wrap it, i took some photo's of the exhaust manifold HKS split pulse
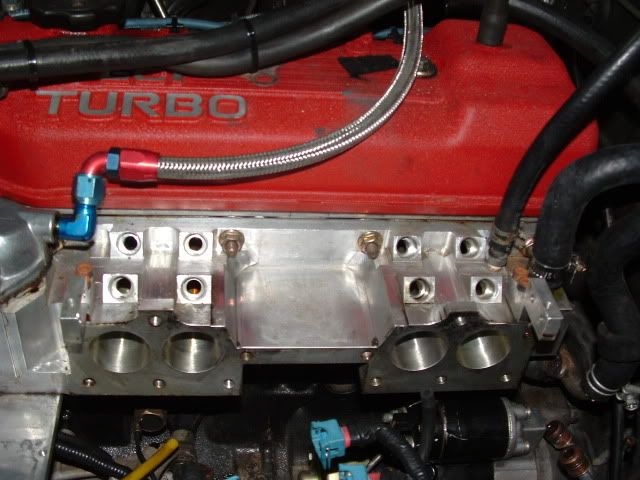
I took photo's of the inlet manifold while i had it off

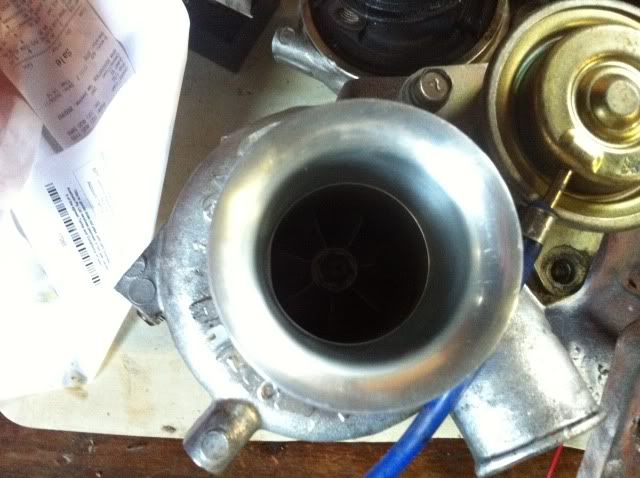
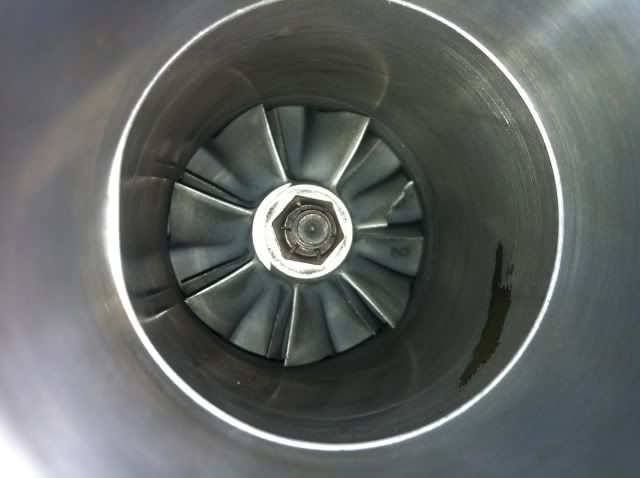
While i was pulling it apart i found the compressor wheel on the turbo has cracked, off to mark next week
I took photo's of the inlet manifold while i had it off
While i was pulling it apart i found the compressor wheel on the turbo has cracked, off to mark next week
Last edited by John196701 on Sun May 15, 2011 8:53 pm, edited 2 times in total.
JB Starion Black, owned since 1988
JB Starion Black, track car build
-
JDSTAZ45
- almost postwhore
- Posts: 1250
- Joined: Sat Feb 12, 2005 10:00 pm
- Location: Inner West, Sydney
Will you replace the compressor wheel with one of those 20G covers that Gtpumps have to offer or do you have something else in mind?
Weld a new opening as the original is too thin?
Also, the detail & custom machine work on the inlet is pretty cool! :)
Edit: I thought the compressor housing opening had cracked with the sleeve over top. But no, the compressor wheel itself.
I hope the fragments have not caused damage internally!
So, big 16G/20G wheel required which I trust will require a full balance and rebuild!
I suppose then you may decide to go for one of those 20G compressor housings without having to worry about crushing the opening...??
Last edited by JDSTAZ45 on Mon May 16, 2011 4:39 pm, edited 3 times in total.
Imports.
88 GSR-VR Widebody 2.6L
87 GSR-V 12V Dash 2.0L
88 GSR-VR Widebody 2.6L
87 GSR-V 12V Dash 2.0L
-
enthuzed
- Austarion Occupant
- Posts: 3578
- Joined: Tue Apr 06, 2004 1:21 pm
- Location: Melborno
- Contact:
Got some questions....
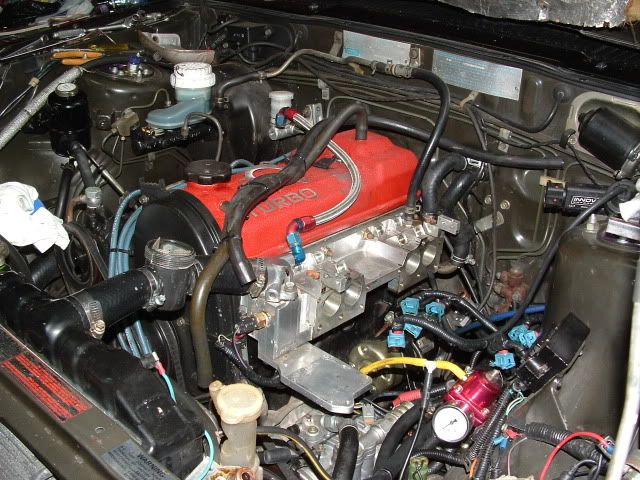
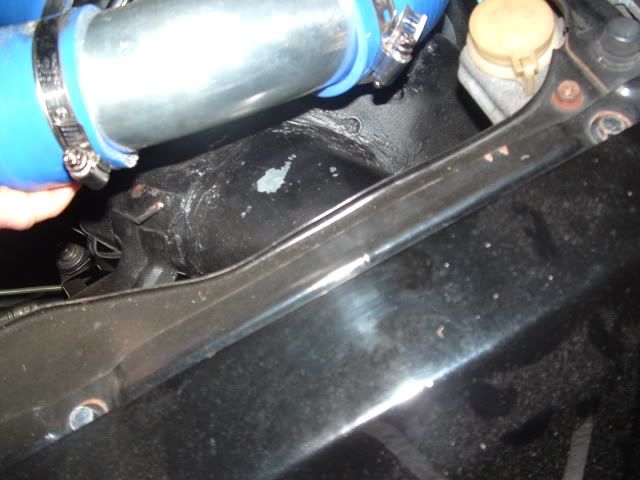
Have you got any more details and pics on the airbox mod?
That 4 inch hole on the inner guard isn't round, did you reshape it at all?
Is there anything else feeding into the guard?
What pod filter did you use and how did you mount it, did you gut the airbox internals?
Have you got any more details and pics on the airbox mod?
That 4 inch hole on the inner guard isn't round, did you reshape it at all?
Is there anything else feeding into the guard?
What pod filter did you use and how did you mount it, did you gut the airbox internals?
Reduce fuel costs by 15-20% & cut emissions by 1/3rd...
Increase engine performance & prolong engine life...
How?
Click the website button below & watch the 3 minute video.
Increase engine performance & prolong engine life...
How?
Click the website button below & watch the 3 minute video.
-
John196701
- I like starions
- Posts: 108
- Joined: Fri Jun 18, 2010 9:36 pm
- Location: Camden
Enthuzed
i basically removed the existing plate and the rubber from the inner guard, i removed the straight section of the cold air intake in the air filter box and cut the side of the air box, i rolled some sheet steel, profiled it with a flange to attach it to the air box, i made it long enough to go through the hole in the inner guard.
the inside of the air filter cover is round, go down to your exhaust shop and get a few inches of 4 inch exhaust pipe, either weld or rivet the pipe into the cover, just use a 4 inch pod filter, i just bought one from supercheap
JB Starion Black, owned since 1988
JB Starion Black, track car build
-
bulldogger
- Lil' Dorifto
- Posts: 48
- Joined: Sat Apr 30, 2011 11:18 pm
- Location: sydney
-
John196701
- I like starions
- Posts: 108
- Joined: Fri Jun 18, 2010 9:36 pm
- Location: Camden
-
John196701
- I like starions
- Posts: 108
- Joined: Fri Jun 18, 2010 9:36 pm
- Location: Camden
Fugazi
No Pics, not pulling the front cover off at the moment.
the sensor, i made up a carrier to mount on the bolt where the balance shaft bearing mounts, i used an allegro ATS685LSH zero speed hall effect transducer, i made a basic amplifier circuit and sealed it with some potting mix.
i have the first tooth after the 2 missing teeth about 90 degrees before TDC.
I will be building another few shortly for the track car i am building up. i will take some pic's then
John
JB Starion Black, owned since 1988
JB Starion Black, track car build
Who is online
Users browsing this forum: No registered users and 1 guest