
Acrylic done properly should be pretty good straight off the gun, but it still requires finishing, which is why professionals use 2 pack paints (full gloss straight off the gun).
My general process for acrylic is:
- Sand back to remove as much old paint as possible (bare metal if possible)
- Bog/fill etc - blade putty is good for little dents (single part epoxy)
- Etch primer (if bare metal) 1:1 thinner/paint mix, light coats - don't aim for full coverage - it's just a primer coat.
- Primer/surfacer (generally mustard-coloured stuff) 2:1 thinner/paint mix. I do about 3 coats within the flash time (about 5 minutes), then allow an half an hour or so to dry and sand back until smooth with 400 (dry). This generates a metric crapload of dust so a vacuum cleaner is a good idea. Repeat until you can't see any imperfections.
- Colour coat 5:3 thinner/paint mix. Do 2-3 coats within flash time, allow 2 hours to dry, then sand lightly with 1000 WET to remove all overspray/rough areas (use your hand to check). Dry off, clean with prep wash and add more coats. Repeat until happy.
- Sand back with 1000 wet until completely smooth. I go so far as to remove ALL pits (orange peel effect) so the surface is totally uniform. This probably isn't entirely necessary, but at least you know it's right!
- Clear coat 5:3 thinner/paint mix. Same procedure as for colour.
- Allow a week to cure and then sand back with 1000 until smooth (remove all pitting). Sand again lightly with 1500 and then use a medium grade cutting compound on it. Follow with paint cleaner/polish/wax. If everything worked, you should be able to see your reflection in it now.
ALWAYS clean everything with prep wash and clean rags after sanding and before painting etc. Everything must be utterly clean - don't touch anything after it's clean. You will go through a whole bag of rags, but it's worth it :)
You should get a reasonable gloss straight off the gun. It should look wet as you apply the paint, but not run. If it's coming out like powder or looks rough, it's probably too much pressure or not enough thinner. If you do a bad coat, don't put more coats straight over the top as it will just make your life harder. If it looks bad, stop, wait for it to dry and sand it back before trying again.
Oh, and wear a proper mask if you like your lungs :)
How To Paint
-
FullOfPlasma

- Lil' Dorifto
- Posts: 46
- Joined: Tue Apr 04, 2006 12:12 pm
- Location: Geelong
Some other tips to add, i'm not expert but i've done it before, I was very happy with my final result so these tips are based on that.
1. A decent air compressor with a oil and moisture trap is VERY VERY important. I used a $30 inline drainable filter in my gun because without it I was blowing heaps of water some days. The more filtered your air is the better. Moister & oil in your paint is bad, end of story.
2. Drain your compressor after you finish using it, and keep the drain plug out till your ready to use it again.
3. 3hp Air compressor does a good job, I used one with a 40ltr tank and direct drive myself bought from Autopro, and it worked flawlessly.
4. My method of painting used a wide fan, then it was just a matter of finding the right balance between air and paint that gave the best finish. I initially tried working with a small fan pattern and had a very rough sandpaper like finish, when I did it with the wide fan my finish was near perfect. (Although I think I used more paint than necessary)
5. Paint in even strokes from Left to right for example, try your hardest to keep the gun steady and at a constant speed. Also when your doing your next line keep a 50% overlap.
6. PRACTICE, think of the stage when your applying your primer as good practice.
7. Read books, websites and ask spray painters as many questions as possible.
8. Get to know your gun, know what all its little knobs do. Keep it clean as possible, remember to always clean it after your finished using it.
9. THINNERS! Their importance cannot be stressed enough, buy as much thinner as you can. Because believe me you'll go large amounts of it. You need to paint, you need it clean your gun, just trust me you'll need it.
10. If your painting in the cold heat your room. I used a big industrial kerosene heater to heat the room up for about 5-10mins before powering it off to paint.
11. Keep the floor wet, helps with the dust problem.
12. If your doing it in an old garage I recommend painting it all. I just got heaps of free white house paint and painting this old shed, really helped eliminate the dust problem.
13. Lighting, good ceiling lighting, I used 3 big fluro's and a couple of cheap home made portable lights (ie poles with a light concrete base with floodlights attached, very effective) However the more lighting the better, I found fluro's were great to work with I would've preferred a lot more.
14. A good quality filtered mask unless you want to get high and poison your brain.
15. Don't try and rush things, you make more mistakes and never get the job done right.
16. Try to use as little fillers and bog as possible.
17. Paint stripper is evil, messy, painful on your skin, potent to breath in and sometimes more work and totally unecessary. Although it can be very useful if you need to get something back to bare metal without sanding. Use wisely, and remember to clean the surface with wash the surface down with prepwash to get rid of the residue. The stripper i used said to wash the surface with water, dry.
18. Prepwash if your friend. Gets rid of dirt, grime and oils, use before applyling your primers. But dont use before applying your clear coat (correct me if im wrong)
19. When sanding down primer and surface prior to priming the Dual action sander is a life saver. I used 180 on bare metal, then 320 prior to appling prior, dont know if that was necessary. I used 320 on priming to get it nice and smooth, used it when I was sanding high fill on a door filling cracks. Coolest thing I ever was was these deep scrates (due to a friend messily using 80 grit) just filled with yellow then the original (sanded back) paint kinda blending in, kinda reminded me of the surface of Europa. Anyway the DA sander cant do everything but it can do a bulk of the sanding work that would otherwise take you forever with your hands. Bear in mind it uses alot of air, my 3hp compressor struggled with it, I had to take breaks. Also Ive been told to use cheapies, I used a $70 ebay item and it did the job quite effectively.
20. Buy your sand paper in bulk.
As I said I dont profess to be an expert but these are tips based on when I did it myself. It was a learning curve, I wouldnt be to keep keen to do it again admittantly, I did it on my old Honda (had a few months spare I had to find something to do) although my good work has been damaged by careless people on the roads and in parkings.
"I've been really drunk in several major capital cities around the world, but Tokyo was the most fun...so far!"
VL's are for someone who can't afford a skyline but is willing to spend the cost of a GTR modifying it.
VL's are for someone who can't afford a skyline but is willing to spend the cost of a GTR modifying it.
-
insane_clown

- Big Dorifto
- Posts: 75
- Joined: Mon Sep 26, 2005 7:19 pm
- Location: Victoria, Lynbrook
I would just like to add a bit on FullOfPlasma step 3. This would be one of the most important steps.
Condensation forms in the compressor tank, if this condensation is not drained it will work its way up the hose and end up coming out of the gun with the paint which we don't want.
In my experiences with spray painting practice on something before you start your real project, get the feel for the gun and the paint flow.
Keep the gun the same distance from the surface. Don't keep your arm straight.
If you keep your arm straight you will end up with more paint in the middle and less cover at the start and the end.
It is easier to apply more paint than adding too much than try to sand it off.
Just one more thing is ventilation, make sure you don't do this in an enclosed area. In my experience fresh air is a good thing.
Mods can delete this if they want.
An easy way to stop water from getting to the gun is to hang part of the hose nearest the compressor over something high - preferably 2 metres or more. Water will condense out pretty quickly and will run back towards the compressor's water trap. I have a water trap on the end of the gun as well - i've never had to drain it as it's always dry.
Also do one or two coats horizontally, and then the same vertically. This stops tiger-striping. Twist the nozzle around on the front of the gun to get a horizontal or vertical fan.
Paint stripper is ok - just make sure you clean it off properly before painting. I found that I had to go over it with a sander afterwards anyway as the stripper tends to leave some paint behind, but it will speed up paint removal significantly. Also, to get the stripper to work, you need to cut up the surface of the old paint by running over it with 60grit paper on an orbital sander or similar. A sealed paint surface tends to laugh at the stripper otherwise!
I also really wouldn't use a power sander for anything except removing the old paint - there is a very good chance you will cut through the new paint on corners and edges and then you'll have to paint it again. If you NEED to use a power sander for cutting the paint back, you're doing something wrong :)

Brilliant stuff
Thanks a lot, I'm in the process of preparing for painting. This along with a few books I have coming and some research will be really helpful.


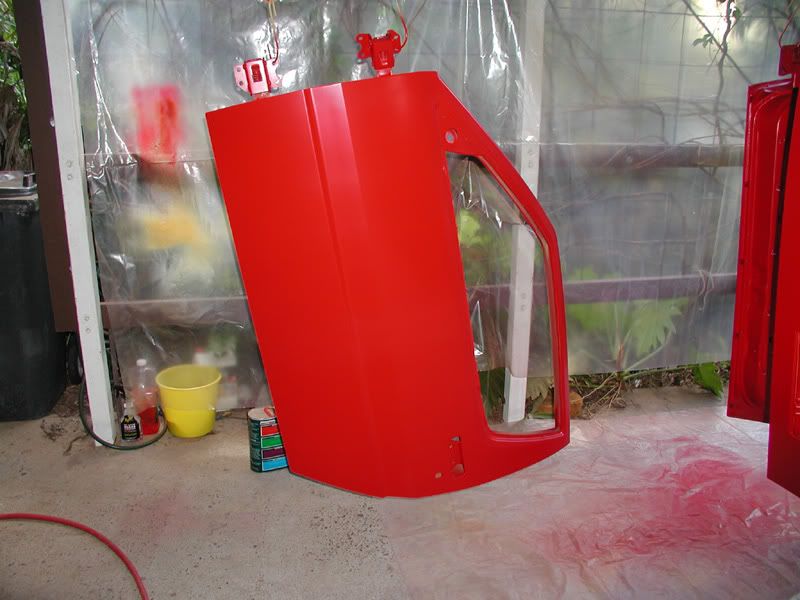
Final coats are on
Charlie, I finally managed to get the final coats on it tonight. It has either been too hot or too wet these last few weeks. Anyway I gave it another six coats tonight and it will be amazing, cant wait to cut it back. One thing I learned form the videos and books and by actually doing it was make sure your gun pressure is correct. Check the pressure AT THE GUN not at the comressor using an inline gauge. Also dont rush the application, its amazing how slow you can go and how wet you can apply the paint without it running. Nine coats all up and not one run.
-
JD_Stazza_Brendan
- almost postwhore
- Posts: 1131
- Joined: Tue Jan 25, 2005 10:46 pm
- Location: Mackay, QLD, Australia
Who is online
Users browsing this forum: No registered users and 8 guests