
hey guys
Am in the process of delooming my vr4 loom that im using for my conversion and getting rid of all the un-needed wiring.
Im using a EMS stinger computer and have had no issue wiring that in to the loom, the problem im having is figuring what wires need to be joined from the dohc dash loom plugs into the starion dash loom that goes to the speedo area.
I also discovered the modulator box thing near where the glovebox is, and dont know whether anything from there needs hooking up.
Ive got a USA service manual, but its a bit hard to make head or tail of as think some of its different.
Any help with this wiring appreciated, or if anyone could decipher the wiring from the dash loom into the engine loom thatd be great.
Cheers
Wiring dash loom into dohc loom PICS UP PLS HELP!!
Wiring dash loom into dohc loom PICS UP PLS HELP!!
Last edited by Lunacy on Wed Feb 10, 2010 7:11 pm, edited 1 time in total.

Right heres pics of what wires i need to figure out:
This is plug B38 from loom behind steering column which joins to starion engine bay loom in case anyone actually has a diagram with this plug on it.
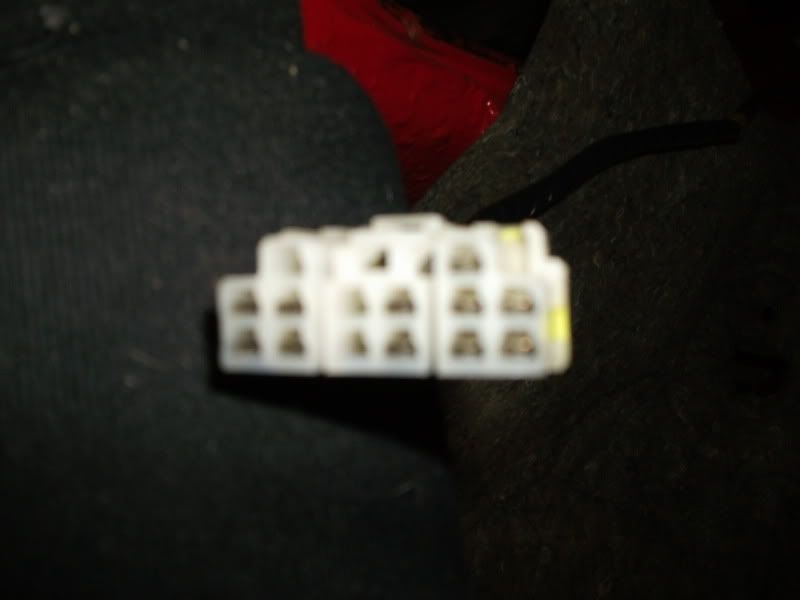
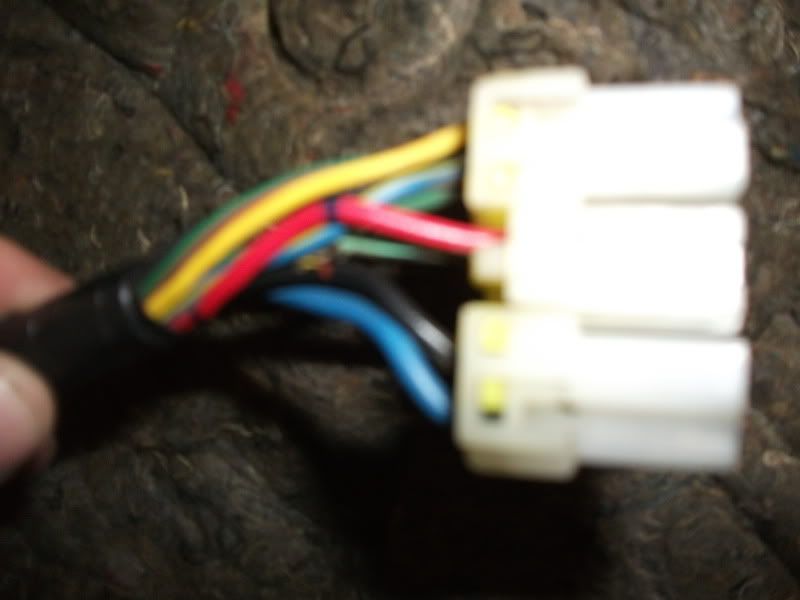
Heres the pic of the male starion dash plug wire colours:

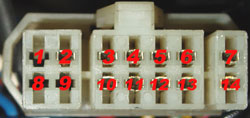
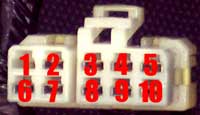
These are the vr4 dohc loom plugs:
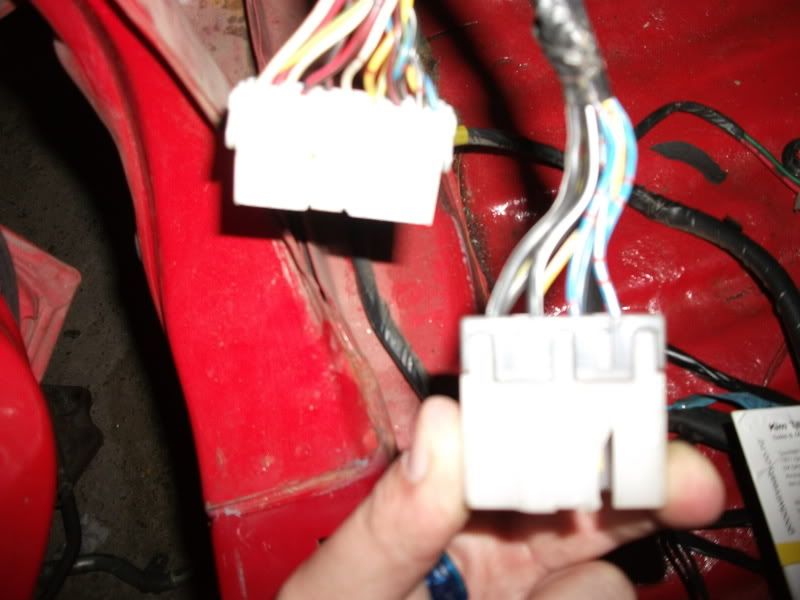
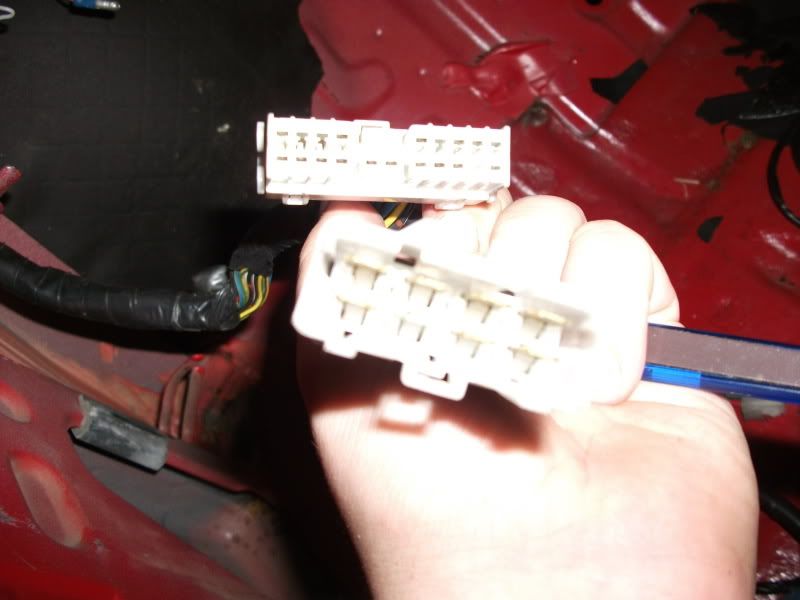
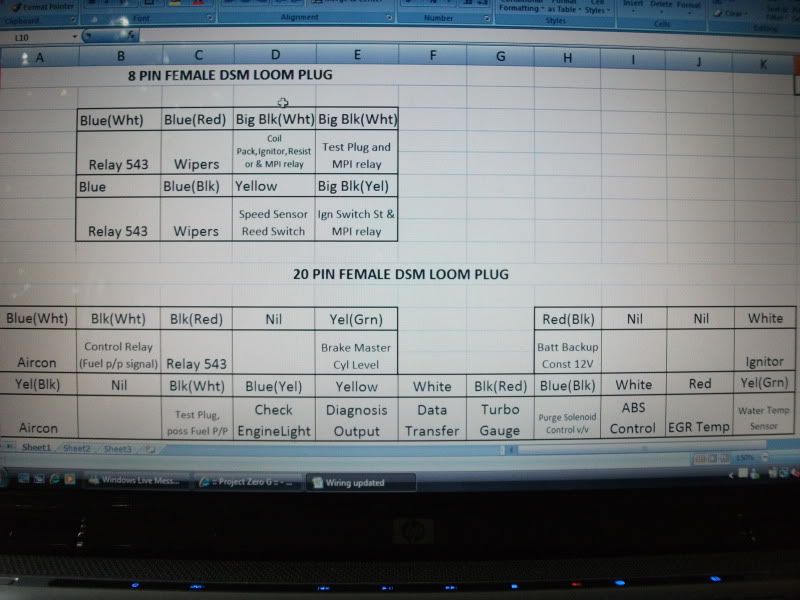
And these are the wire colours on all the plugs:
Sorry if pic is a bit rubbish
If anyone can help me with info on which wires i need to hook up thatd be great.
This is plug B38 from loom behind steering column which joins to starion engine bay loom in case anyone actually has a diagram with this plug on it.
Heres the pic of the male starion dash plug wire colours:
These are the vr4 dohc loom plugs:
And these are the wire colours on all the plugs:
Sorry if pic is a bit rubbish
If anyone can help me with info on which wires i need to hook up thatd be great.


LOL how much money did you spend on your build again? :PVulpes wrote:this is exactly why I would never do a twin cam swap. Too many headaches and too much money.
quest wrote:don't try explaining that to her tho..... just leave. lolWANTSOM wrote:Personally, I find sloppy boxes very unsatisfying. I like them tight and taught to the point that if you dont have to push to get it in then its probably too old and time to get a new one :P
Yep but i tell ya what, ive learnt SO much about my car doing this. Im slowly figuring my way through the wiring diagrams and ill get there eventually.thrash wrote:LOL how much money did you spend on your build again? :PVulpes wrote:this is exactly why I would never do a twin cam swap. Too many headaches and too much money.
Doing this swap means that if i ever have any problems with it once its done, i will have been there done that and should be able to diagnose and fix it quickly :)
-
panda

- Enthusiast
- Posts: 680
- Joined: Fri Apr 18, 2008 2:56 pm
- Location: Mount Gambier, South Australia
Years of reading & theory are no substitute for personal experience. :)Yep but i tell ya what, ive learnt SO much about my car doing this. Im slowly figuring my way through the wiring diagrams and ill get there eventually.
Doing this swap means that if i ever have any problems with it once its done, i will have been there done that and should be able to diagnose and fix it quickly :)
Dreams have no limits.
1982 JA - Ex Enthuzed
1982 JA - For Sale - pending
1983 JA - Ex Auto-cross car - being parted out
1983 JA - Being parted out
1984 JA - Rolling shell - For Sale
1985 JB - Rally car project
1985 JB - Autocross car
1985 JB - Week-end cruiser
1982 JA - Ex Enthuzed
1982 JA - For Sale - pending
1983 JA - Ex Auto-cross car - being parted out
1983 JA - Being parted out
1984 JA - Rolling shell - For Sale
1985 JB - Rally car project
1985 JB - Autocross car
1985 JB - Week-end cruiser
Very true nothing like gettin in and doin it to learn a few things :)panda wrote:Years of reading & theory are no substitute for personal experience. :)Yep but i tell ya what, ive learnt SO much about my car doing this. Im slowly figuring my way through the wiring diagrams and ill get there eventually.
Doing this swap means that if i ever have any problems with it once its done, i will have been there done that and should be able to diagnose and fix it quickly :)
-
MainstreaM
- I've been here before
- Posts: 201
- Joined: Sat Nov 20, 2004 7:04 pm
- Location: USA
- Contact:
Luckily, the engineers of the Starion wiring kept things tidy. Only one plug connects the chassis to the engine (basically). This plug is called "B-38". Knowing B-38 is all you need to know if you're going stand alone. How about that?
1988-up 14pin
Pin Name
1 None
2 +12V Constant
3 Cruise
4 +12V Switched (Ignition)
5 Switched +12V Power
6 Inhibitor Switch (Auto)
7 Oil Pressure Gauge
8 None
9 None
10 Diagnosis Output
11 Start
12 Temp Gauge
13 Boost Gauge
14 Vehicle Speed Sensor
For wire colors, see here - page 60 -
http://www.starquestgarage.com/manuals/ ... trical.pdf
1987-down 10pin
Pin Name
1 None
2 +12V Switched (Ignition, Coil +)
3 +12V Constant
4 Ground
5 Oil Pressure Signal
6 Diagnostics
7 Starter Signal
8 Temp Gauge
9 Boost Gauge
10 Vehicle Speed Sensor
For wire colors see here - around page 220 -
http://www.starquestgarage.com/manuals/ ... trical.pdf
Here is some more info that you might find helpful
Pin 2: 12V power for backup memory in the ECU. This fuse (10A) is in the fancy fuse box below the steering wheel.
Pin 3: This wire is cruise control related. I am not sure of the actual function.
Pin 5: 12V power for when the ECU is on. On the DSM this fusible link was located on the positive battery terminal. On the Starion this is the "ECI" fusible link wire (bullshit).
Pin 6: The inhibitor switch is what keeps a car with an automatic from starting when it is in gear (that could get ugly). Actually it could be ugly in a manual too. That is why cars usually have a clutch switch... and surprisingly the Starion has no such safety device. You don't even need to push the clutch to start this thing. Anyways... This should be grounded on a manual transmission car.
Pin 7: Oil Pressure Gauge. This works too! Oil pressure gauges rule!
Pin 10: Hooking up to this will allow you to check ECU codes with the Starion checker plug located above the glove box. It would be better to upgrade to an OBDI plug.
Pin 12: Temp Sender signal to cluster. Temp sensor works!
Pin 13: ECU boost level. Stock boost gauge works!
Pin 14: There is not a VSS in the transmission. The signal is generated by the cable turning the reed switch in the speedometer. This generates the signal and sends it to the ECU. I don't really know what a 1G ECU would do with a Vehicle Speed signal.
Fuel Pump - The fuel pump comes from the ECI control relay. This wire is rather thick. You will need to find a plug to connect this to the chassis harness' fuel pump wire. I usually cut a new 1-pin plug off a parts car and solder it in.
The Tachometer - The tach gauge signal comes off of the coil on the Starion. It runs up the driver side fender and into the dash. The DSM tach signal comes from the coil pack and through the ECU. Its your call to tap in at the coil or at the ECU.
Oil Pressure Gauge - You will need to run several wires from the oil filter housing. One of these is for the oil pressure gauge. Simply tie this wire into pin 7 of B-38 to have a functional oil pressure gauge.
Credit:
All info posted came from DJpowerhaus and www.projectzerog.com. I only added the diagram links.
Kane
Thanks for that Kane, ive been using it or trying to for the last few days.
Only prob is my plugs are different to those on there, and as there are no wiring colours ive had to do a lot of checking wires with my multimeter.
Im getting thru it slowly but surely and will document the wiring when i know ive got it sorted and correct.
Only prob is my plugs are different to those on there, and as there are no wiring colours ive had to do a lot of checking wires with my multimeter.
Im getting thru it slowly but surely and will document the wiring when i know ive got it sorted and correct.

thinking about it last night we should beable to get the 12v during cranking from the coil + as it will need power during cranking to fire the spark plugs...Lunacy wrote:Il let ya know soon as i hook a battery up to mine :)iXNAY wrote:im trying to find where i can get a constant 12v for my ECU while the engine is cranking as it seems the 12v IGN ON drops out when car is cranking.
SR20 powered starion what have I done..... :P

I'm also working on connecting a evo 3 loom upto my starion.
And in my car (1988 euro spec 2.0 widey) the b38 plug was already cut by the previous owner (i bought just the shell)
But I've used the thick Blue wire for IGN On as it remains on even when starting.
And in my car (1988 euro spec 2.0 widey) the b38 plug was already cut by the previous owner (i bought just the shell)
But I've used the thick Blue wire for IGN On as it remains on even when starting.
-------------------------------------------
83 2000EX runner.
88 2.0 Black Widebody DOHC evo 6 turbo at 1.7 bar
88 2.6 White Widebody. spun a bearing.
06 2.0 Lancer Wagon. daily driver.
83 2000EX runner.
88 2.0 Black Widebody DOHC evo 6 turbo at 1.7 bar
88 2.6 White Widebody. spun a bearing.
06 2.0 Lancer Wagon. daily driver.
-
redzone
- racking my brains
- Posts: 5900
- Joined: Thu Oct 06, 2005 10:46 pm
- Location: sunshine coast qld
- Contact:
i never do it this way as it's too much of a headfuck and you're using old wiring.. just make a new loom, it's easier!
Fibreglass airdams $370, fibreglass front bumpers $260, reco drag links $165, alloy radiators $925 (unpolished), h/l switch rebuilds $125, all plus freight.
Coxs Automotive (07)54433507 3/5 Service st Maroochydore Q
www.facebook.com/coxsautomotive
www.coxsautomotive.com.au
Coxs Automotive (07)54433507 3/5 Service st Maroochydore Q
www.facebook.com/coxsautomotive
www.coxsautomotive.com.au
id have to agree with you its actually not that hard or that big a job and also if a problem comes up you can probably fault find it yourself fairly quickly.redzone wrote:i never do it this way as it's too much of a headfuck and you're using old wiring.. just make a new loom, it's easier!
SR20 powered starion what have I done..... :P
Who is online
Users browsing this forum: No registered users and 8 guests