Redzone's how to DOHC your starion block thread
-
redzone
- racking my brains
- Posts: 5900
- Joined: Thu Oct 06, 2005 10:46 pm
- Location: sunshine coast qld
- Contact:
Alright alright ill try & get this thread fixed up before the end of the weekend!
Fibreglass airdams $370, fibreglass front bumpers $260, reco drag links $165, alloy radiators $925 (unpolished), h/l switch rebuilds $125, all plus freight.
Coxs Automotive (07)54433507 3/5 Service st Maroochydore Q
www.facebook.com/coxsautomotive
www.coxsautomotive.com.au
Coxs Automotive (07)54433507 3/5 Service st Maroochydore Q
www.facebook.com/coxsautomotive
www.coxsautomotive.com.au
Original Posts with pics from RedZone
--------------------------------------------------
Well ok i think i have enough pics/info now to throw this thread together. bear with me though as i need to collate a lot of pics/info.
a basic rundown:
Starion block
starion upper balance shaft
starion or galant LONGNOSE crank
n/a galant bigport head
n/a galant timing cover/lower balance shaft assembly
n/a galant timing gears/idlers etc
more to come
-----------------------------------------
Ok the basics first! the twin cam type crank pulleys on the left, late sohc on the right:

These crank girdles are the only real benefit of using a narrowblock over a starion block, but they can be used if you line bore the starion block to suit them:

There are two different starion cranks, a long nose and short nose, the digital verniers tell the story. the long nose is the one you want for a twin cam pulley setup. the stock twin cams are long nose.


Here are the stock rods from a starion, dohc n/a and a VR4 motor. as you can see, they're identical, and safe for about 7000rpm. they dont compress under power loading either (within reason) but its so cheap for aftermarket rods these days why not use them?

If you retain the balance shafts, use the starion upper shaft with the starion block, as the dohc shaft hasnt got provision for oiling the rear bearing. also use the dohc oil pump housing complete with the dohc shaft etc. starion one is the top one.

Here is the stock dohc motor from a front view. note the pulley/tensioner arrangement. the stock auto tensioner is best converted into a manual adjustable type, APC do this cheaper than i could get it done. but yes just use all the dohc pulleys/brackets/alternator p/s pump etc.


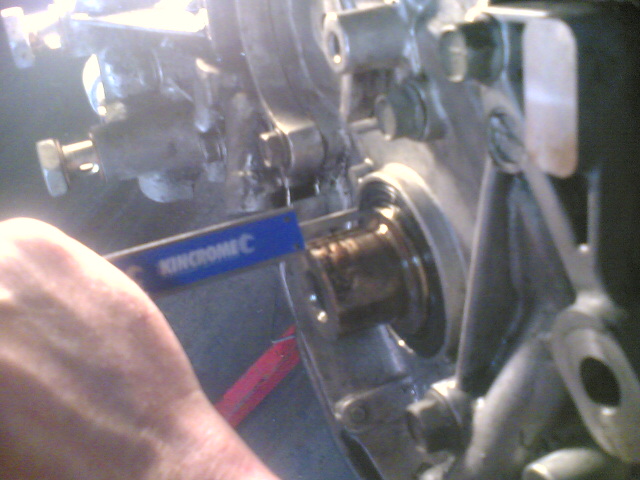
Cooling system - use the dohc type water pump, with some nifty alloy spouts welded on


Water outlet from the back of the head, if you werent loucky enough to get one from wantsom

Here are a couple of extra holes put into the front of the block, to replicate the dohc ones. allows coolant from to the front of the head

Here is the transfer pipe i made up that runs down the middle of the intake manifold, after you ditch the stock dohc coil setup. Note you can buy the 4AC AE82 thermo housings new from KC, then you avoid having troubles getting a nice weld on them!

Power steering bracketry: use the dohc pressed/welded steel bracket, then a redzone power steering bracket kit
[url=https://flic.kr/p/o4r74M]/5580/14478696587_b7ddbc9d3b_o.jpg[/img]

As you can see, the front piece is welded onto the alternator bracket


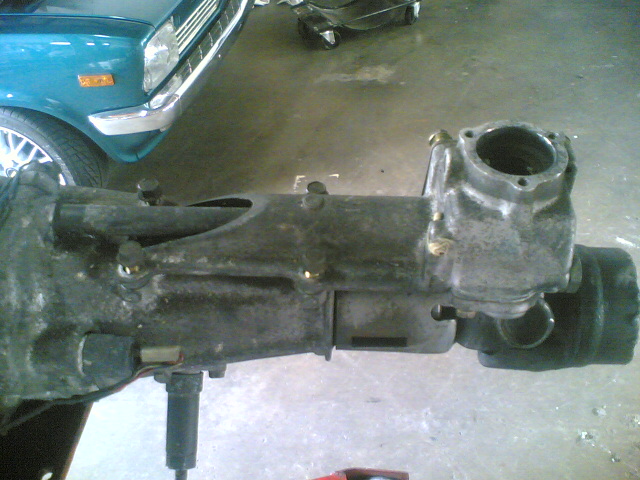
RX7 FC gearbox conversion.
some comparison pics first:


N/A galant HG/HH intake manifold mods for rear wheel drive, conversion to falcon throttle body:


1) Can you still fit the Airconditioning compressor to the RHS of the engine because the alternator and PS pump is on the left with your kit?
yes, you use the twin cam aircon compressor and bracket to match the twin cam pk type pulleys you use obviously some cut an weld on the a/c pipes to the compressor. ps i'll have a price on the power steering bracket kit soon also
2) Is this all you really need to do in order to do this conversion? I only ask because the CAS wasn't covered (May not be an issue once you add new bellhousing and gearbox.) And would be really nice to see the brackets you made up for the gearbox and to see the mod for the yoke and driveline.
yeah i'll take some more pics when she's up on the hoist next showing more of the gearbox conversion. i slotted the original engine mount brackets on the motor at both mounting points to move the motor forward 12mm. if u are running a ems stinger or other cheap computer which cant do sequential, you could avoid moving it forward and use a crank angle sensor instead of the cam angle sensor.
---------------------------
And that's all - many thanks to Hugh for saving these pics and forwarding them on - Cheers!
:beer
--------------------------------------------------
Well ok i think i have enough pics/info now to throw this thread together. bear with me though as i need to collate a lot of pics/info.
a basic rundown:
Starion block
starion upper balance shaft
starion or galant LONGNOSE crank
n/a galant bigport head
n/a galant timing cover/lower balance shaft assembly
n/a galant timing gears/idlers etc
more to come
-----------------------------------------
Ok the basics first! the twin cam type crank pulleys on the left, late sohc on the right:
These crank girdles are the only real benefit of using a narrowblock over a starion block, but they can be used if you line bore the starion block to suit them:
There are two different starion cranks, a long nose and short nose, the digital verniers tell the story. the long nose is the one you want for a twin cam pulley setup. the stock twin cams are long nose.
Here are the stock rods from a starion, dohc n/a and a VR4 motor. as you can see, they're identical, and safe for about 7000rpm. they dont compress under power loading either (within reason) but its so cheap for aftermarket rods these days why not use them?
If you retain the balance shafts, use the starion upper shaft with the starion block, as the dohc shaft hasnt got provision for oiling the rear bearing. also use the dohc oil pump housing complete with the dohc shaft etc. starion one is the top one.
Here is the stock dohc motor from a front view. note the pulley/tensioner arrangement. the stock auto tensioner is best converted into a manual adjustable type, APC do this cheaper than i could get it done. but yes just use all the dohc pulleys/brackets/alternator p/s pump etc.
Cooling system - use the dohc type water pump, with some nifty alloy spouts welded on
Water outlet from the back of the head, if you werent loucky enough to get one from wantsom
Here are a couple of extra holes put into the front of the block, to replicate the dohc ones. allows coolant from to the front of the head
Here is the transfer pipe i made up that runs down the middle of the intake manifold, after you ditch the stock dohc coil setup. Note you can buy the 4AC AE82 thermo housings new from KC, then you avoid having troubles getting a nice weld on them!
Power steering bracketry: use the dohc pressed/welded steel bracket, then a redzone power steering bracket kit
[url=https://flic.kr/p/o4r74M]/5580/14478696587_b7ddbc9d3b_o.jpg[/img]
As you can see, the front piece is welded onto the alternator bracket
RX7 FC gearbox conversion.
some comparison pics first:
N/A galant HG/HH intake manifold mods for rear wheel drive, conversion to falcon throttle body:
1) Can you still fit the Airconditioning compressor to the RHS of the engine because the alternator and PS pump is on the left with your kit?
yes, you use the twin cam aircon compressor and bracket to match the twin cam pk type pulleys you use obviously some cut an weld on the a/c pipes to the compressor. ps i'll have a price on the power steering bracket kit soon also
2) Is this all you really need to do in order to do this conversion? I only ask because the CAS wasn't covered (May not be an issue once you add new bellhousing and gearbox.) And would be really nice to see the brackets you made up for the gearbox and to see the mod for the yoke and driveline.
yeah i'll take some more pics when she's up on the hoist next showing more of the gearbox conversion. i slotted the original engine mount brackets on the motor at both mounting points to move the motor forward 12mm. if u are running a ems stinger or other cheap computer which cant do sequential, you could avoid moving it forward and use a crank angle sensor instead of the cam angle sensor.
---------------------------
And that's all - many thanks to Hugh for saving these pics and forwarding them on - Cheers!
:beer
1987 JD Starion
-
redzone
- racking my brains
- Posts: 5900
- Joined: Thu Oct 06, 2005 10:46 pm
- Location: sunshine coast qld
- Contact:
Sorry I was so slack with this, every time I remembered it I wasnt near a computer!
To make it easier to read I can edit the pics into the original post if u like :beer
Slotting/redrilling the engine mounts gave plenty of clearance for the cas. This conversion has been up and running now for some time, in steve/bao's black widebody.
To make it easier to read I can edit the pics into the original post if u like :beer
Slotting/redrilling the engine mounts gave plenty of clearance for the cas. This conversion has been up and running now for some time, in steve/bao's black widebody.
Fibreglass airdams $370, fibreglass front bumpers $260, reco drag links $165, alloy radiators $925 (unpolished), h/l switch rebuilds $125, all plus freight.
Coxs Automotive (07)54433507 3/5 Service st Maroochydore Q
www.facebook.com/coxsautomotive
www.coxsautomotive.com.au
Coxs Automotive (07)54433507 3/5 Service st Maroochydore Q
www.facebook.com/coxsautomotive
www.coxsautomotive.com.au
Who is online
Users browsing this forum: No registered users and 1 guest